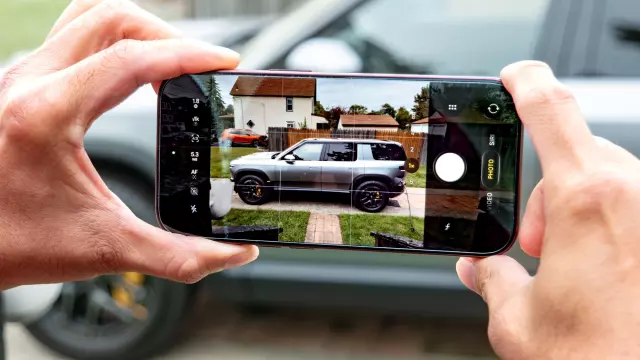
How to Customize Pro Controls Layout on an iPhone 18 Pro and 18 Pro Max
- Tags
- iPhone 18 Pro Max
- Apple
- Mobile Photography
- Pro Controls
- iPhone 18 Pro
- iOS
- Camera Tips
Mastering Your iPhone 18 Pro Camera Experience
For the past couple of weeks, mobile tech enthusiasts and professional photographers alike have been putting the new iPhone 18 Pro and 18 Pro Max camera upgrades through their paces. While the revolutionary variable aperture system has naturally grabbed the headlines—delivering an unprecedented natural depth of field previously reserved for standalone mirrorless cameras—the true hidden gem for many power users is the introduction of advanced Pro Controls.
Apple has historically been cautious about offering completely manual interfaces to everyday users. However, recent generations have introduced incremental updates, culminating in a fully fleshed-out suite of manual features. The real breakthrough, however, is a hidden customization trick: the ability to completely tailor the Pro Controls layout to fit your exact shooting workflow.
Why Customizing Pro Controls Matters
Whether you prefer to keep your shutter speed pinned front and center for fast-paced street photography, or need the manual focus slider precisely positioned for delicate macro shots, customizing your camera's user interface drastically improves usability. Instead of constantly hunting through nested menus or tapping secondary icons while trying to capture a fleeting moment, personalization brings your most-used tools right to your fingertips.
Step-by-Step Guide: How to Customize Pro Controls Layout
Adapting your camera interface to keep vital settings within easy reach takes only a few seconds. Follow this simple procedure to personalize your layout:
- Step 1: Open the Camera App and Access Pro Controls
Launch the Camera app on your iPhone 18 Pro or iPhone 18 Pro Max. Locate the control icons displayed on the side opposite the shutter button. By default on a new device, you will likely see shortcuts for Live Photos and the LED flash. Press and hold any of these icons to initiate the editing mode. - Step 2: Make Your Selections and Organize
An "Add Photo Controls" overlay will appear, showcasing icons for every available manual parameter. You can actively configure anywhere from two to eight controls simultaneously. Once you have chosen your preferred settings, simply drag and drop the icons into whatever arrangement suits your personal shooting style. Tap "Done" when you are finished to lock in your custom layout.
Seamless Integration Across Photo and Video
Once saved, your preferences remain locked in your custom order, vastly streamlining your shooting process. This flexibility allows you to make rapid adjustments on the fly, letting you focus entirely on composition rather than software navigation.
Even better, this layout customization seamlessly transitions into video recording modes. Alongside standard manual adjustments like aperture, shutter speed, manual focus, and white balance, Apple incorporates specialized video tools such as Dual Capture, Action mode, and Adaptive time-lapse recording, which automatically lowers frame rates when motion is detected.
Comments (0)
Sign in to join the conversation.Sign in
Loading comments...